The o-rings required for this repair can be purchased for ~ 10 cents apiece, but retailers will typically require you to purchase in bulk. If you'd rather not purchase an entire package, we buy them in bulk and would be more than happy to send you a set free of charge - simply fill out an o-ring request here. We typically ship next business day and cover the cost as a convenience for our readers.
The EATC module featured herein was optional in Ford pickup and car models for many model years. Prior to performing these procedures, we were quoted nearly $500 USD for a new EATC unit through our local Ford dealership. Fortunately, this inexpensive fix alleviated the problems with this truck and the AC cycles flawlessly through any combination of vents.
Disclaimer - If you're not comfortable working on electronic equipment, leave this repair to a professional. Procedures may vary for applications other than Ford trucks (such as cars and SUVs).
Click any thumbnail to view high resolution fullsize image w/ addition details (where applicable)
• Remove the negative battery cable before proceeding.
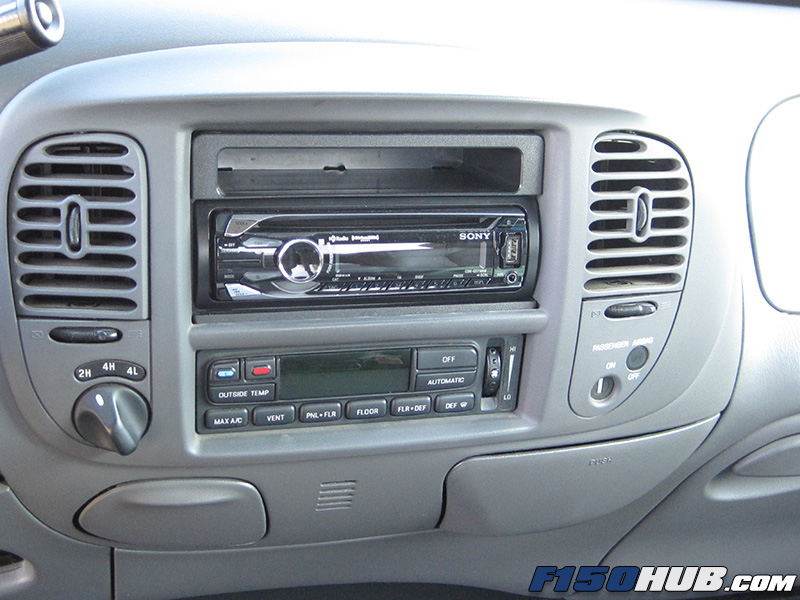
• To reach the EATC, you'll first need to remove the trim piece around the center of the dash. Usually, one of the top corners can be wedged open using your hands. If necessary, a plastic pry bar may be used. Once a corner is pried off slightly, carefully work around the trim panel with your hands until it comes loose. You'll need to unplug the connector for the airbag switch and four wheel drive selector (if equipped), then set the panel aside.
• Release the radio from the dash using the required U shaped tool (OTC part # 7575), then unplug the connector and antenna jack from the backside of the unit. Set the radio aside.
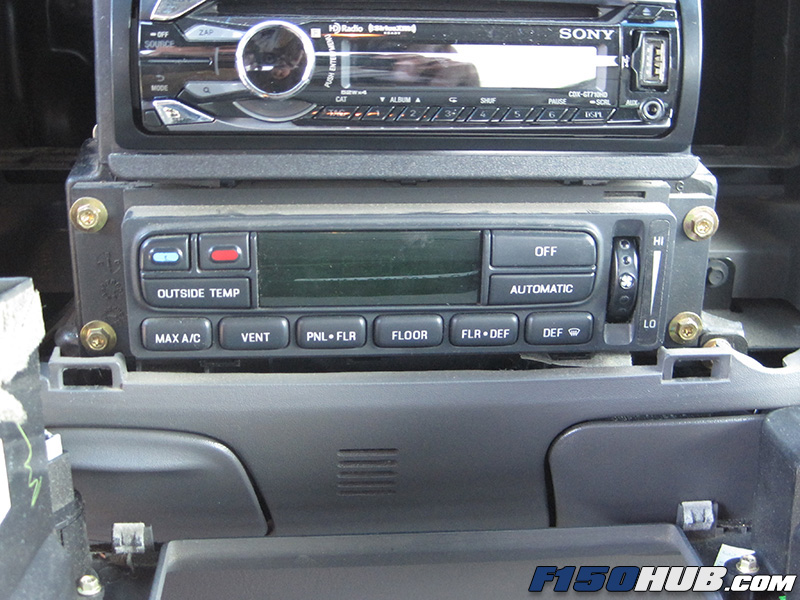
• (4) screws hold the EATC unit in place. Remove them with either a 7mm socket or T20 torx driver, then pull out the unit as much as possible (do not force it, there are lines still attached).
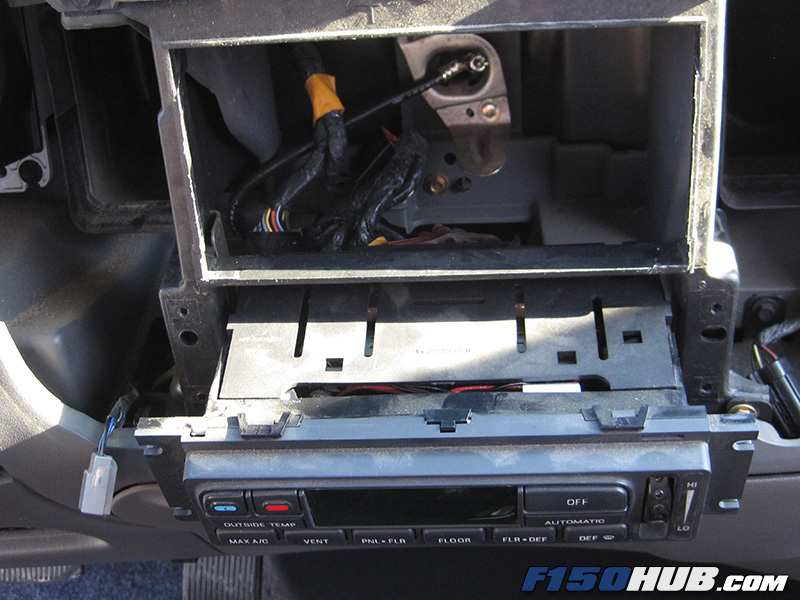
• The EATC unit may or may not slide out far enough for you to access the backside of it without working from inside the dash. Our lines became taunt with the unit hanging about halfway out of its slot (as this is common, we've removed the radio for access). If this is the case, you'll need to blindly remove the vacuum connectors (next step).
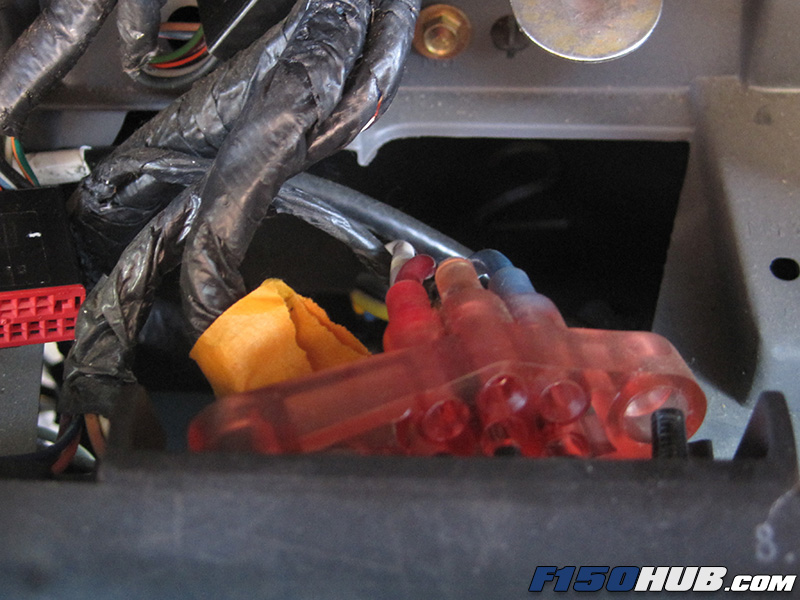
• The translucent red plug on the back of the EATC holds the vacuum lines that control the various vent zones. It is held in place by two 10mm nuts on plastic studs. If you can see the nuts, remove them, then unplug the vacuum line connector.
• If your unit is still tucked in the dash, use a small mirror to locate the nuts, then remove them with a 10mm socket and your hand. You won't need a ratchet or a wrench, as the nuts are not particular tight. With the nuts removed, carefully remove the vacuum connector.
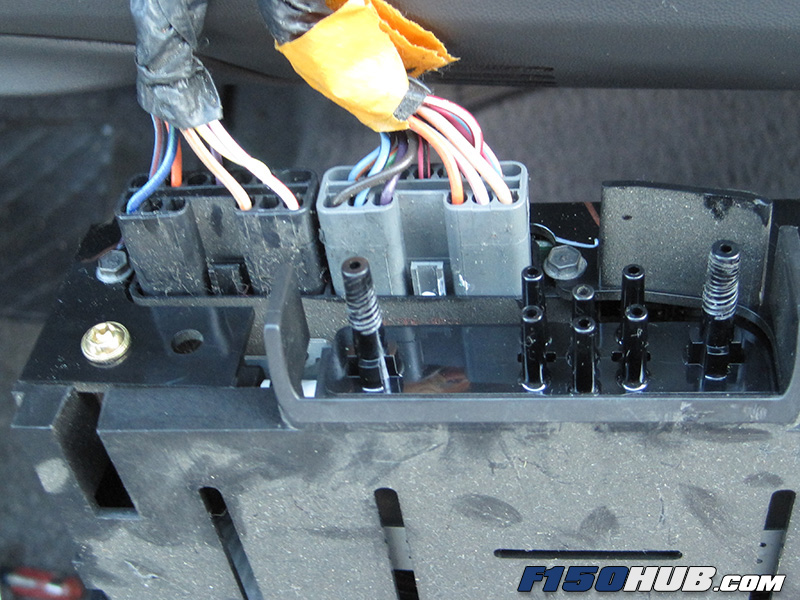
• The final step in physically removing the EATC is to unplug the pair of electrical connectors from the backside of the unit. With the EATC removed, find a clean place to continue working on it.
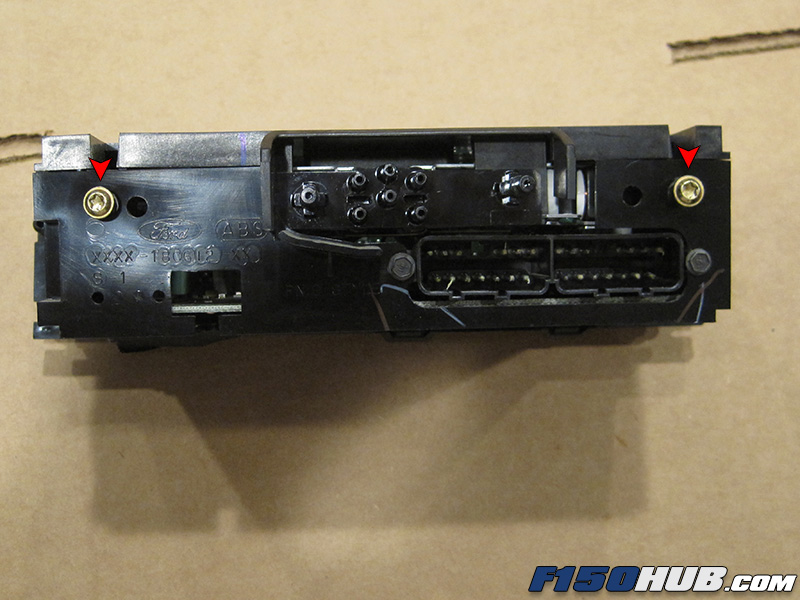
• Remove the two golden screws from the rear of the EATC module (refer to image at left), then carefully lift the lid to reveal the internal components.
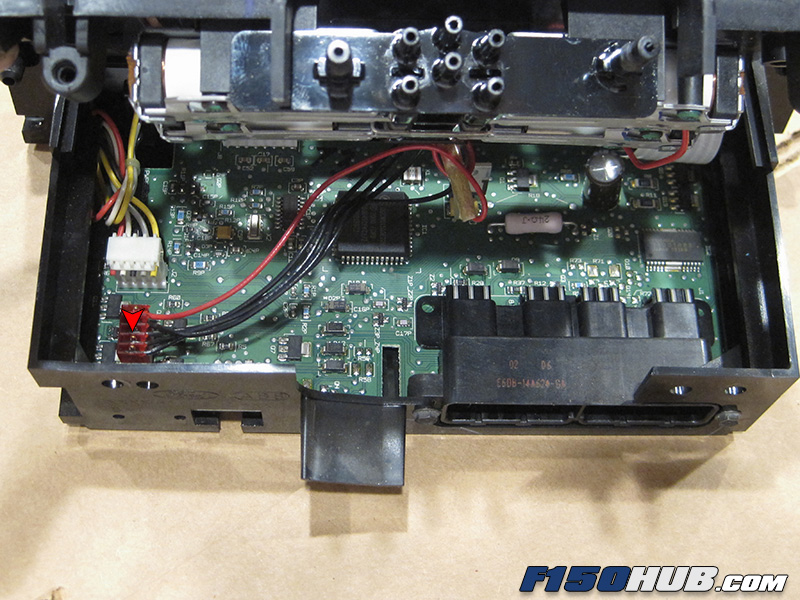
• Inside the EATC, you'll see a small electrical connector (refer to arrow in image at left). Carefully disconnect this small connector so that the vacuum solenoids can be removed from the rest of the unit.
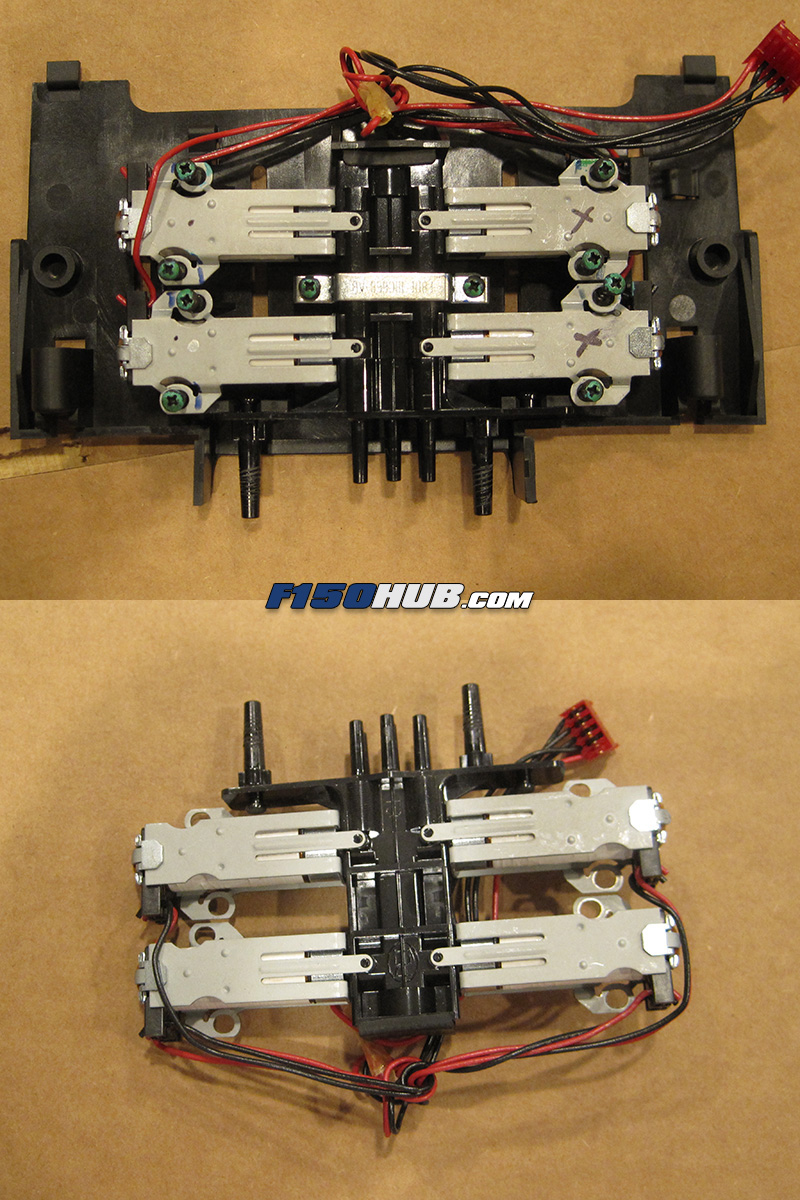
• The vacuum solenoid module is connected to the plastic lid by (10) phillips head screws - carefully remove each one, then separate the solenoid module from the lid.
• There are a total of four solenoids, and since you have the EATC apart you are going to want to replace the o-rings in each solenoid.
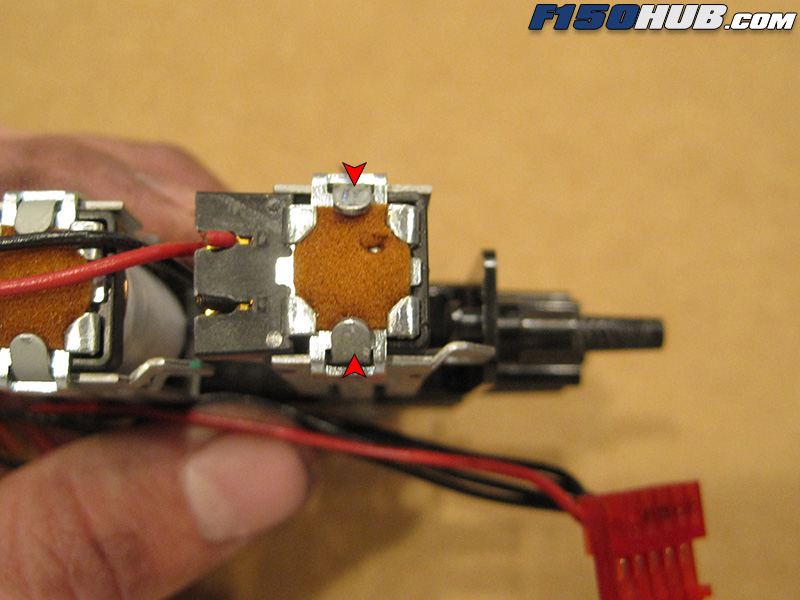
• Next, remove the solenoid plunger. Using needle-nose pliers or a small flat-head screwdriver, carefully pry open the two metal retaining tabs (arrows in image at left). Try not to damage the orange foam, though you're likely to leave a few marks during this process.
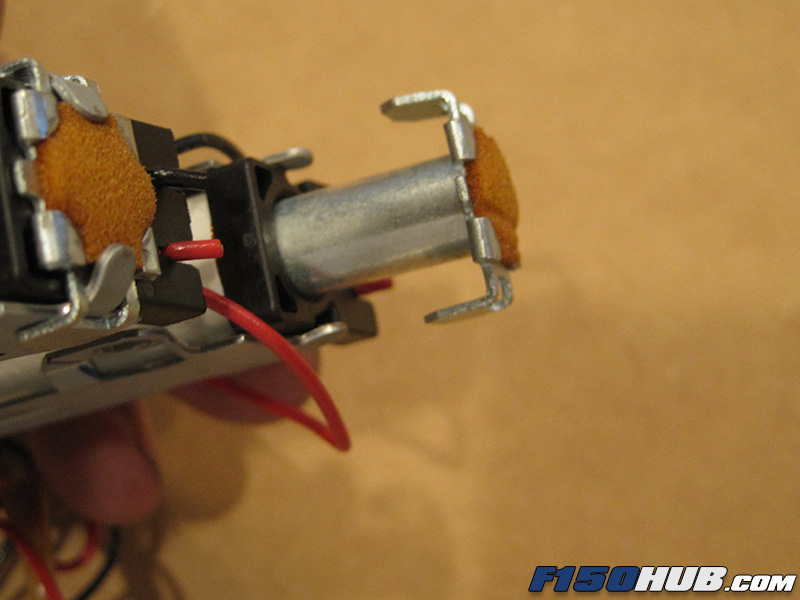
• With the tabs bent vertically, the plunger should slide out of its bore. If the plunger feels tight, the tabs are not bent open properly - the plunger itself is not secured tightly within the bore.
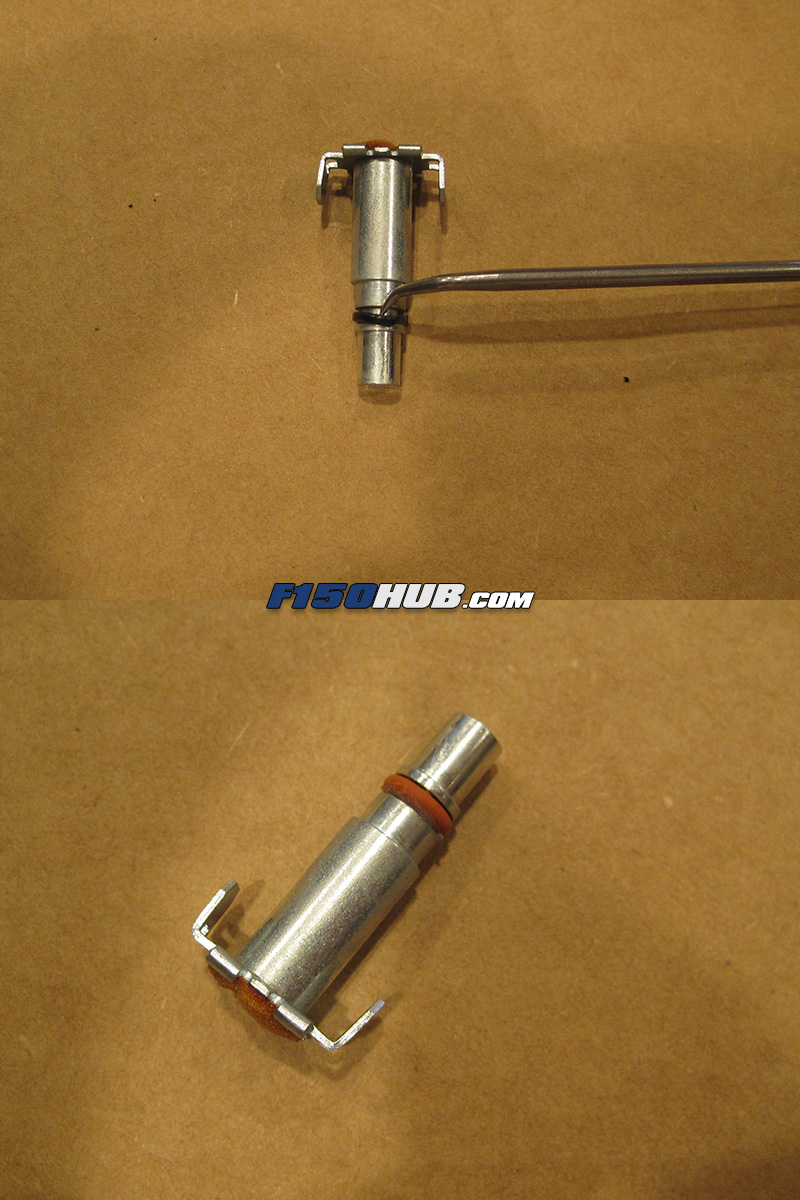
• At last, replace the o-ring (size 007) on the solenoid plunger. Use a conservative amount of dielectric grease on the new o-ring. A small pick works extremely well at removing the old o-ring, which is likely hard, brittle, and will break in half. Do not scratch or scour the surface of the plunger.
• Repeat for each of the four solenoids, then reassemble in reverse order.